What if that blank balcony wall, cramped patio corner, or sunny indoor space could transform into a lush, productive garden growing fresh herbs, vegetables, and flowers without requiring a single square foot of precious floor space?
Thousands of city dwellers stare at empty walls each day, believing gardening requires sprawling yards or country living. They watch cooking shows featuring fresh herbs, dream of homegrown tomatoes, and scroll through garden images online, thinking “I wish I could do that, but I just don’t have the space.” Meanwhile, their vertical real estate sits completely unused, representing untapped potential for growing fresh food and creating living beauty.
Living in a compact apartment, condo, or home with limited outdoor area doesn’t mean sacrificing the joy and benefits of gardening. The solution lies in looking up rather than out. Vertical gardening allows you to transform barren walls, tiny balconies, or even sunny indoor spots into thriving green spaces bursting with life. This guide packs practical DIY vertical gardening ideas specifically designed for small spaces, empowering you to grow herbs, vegetables, flowers, and more, regardless of square footage limitations.
Embracing these techniques represents a cornerstone of modern urban gardening, making green living accessible to everyone from studio apartment renters to townhouse owners. We explore creative, budget-friendly, and practical projects you can build yourself, turning your limited space into a productive and beautiful oasis that provides fresh produce, improves air quality, and creates a peaceful retreat from concrete surroundings.
These DIY vertical gardening ideas range from simple upcycled projects perfect for complete beginners to slightly more involved structures offering substantial growing space. We focus on clear instructions, readily available materials, and adaptable designs suitable for balconies, patios, fences, or even indoor walls near a window. Each project addresses the unique challenges of container gardening in tight spaces while maximizing your ability to grow what you love.
Get ready to unleash your creativity and cultivate your own piece of nature, one vertical layer at a time. This exploration provides not just inspiration, but the practical knowledge needed to succeed with your first vertical garden project and beyond. Whether you want fresh basil for pasta, colorful flowers for visual joy, or the satisfaction of growing your own food, vertical gardening makes it possible even in the smallest urban dwelling.
Why Embrace Vertical Gardening in Urban Environments?
Before diving into specific projects, understanding why vertical gardening represents such a game-changer helps clarify its value, particularly for city dwellers and those with restricted space. The benefits extend far beyond simply finding a place to put plants—they fundamentally change how you can interact with nature in confined environments.
Space Maximization Through Vertical Growing
This represents the most obvious advantage that draws people to vertical gardening. These systems utilize vertical surfaces—walls, railings, fences, room dividers—effectively multiplying your growing area without increasing the footprint you’re already working with. A small balcony measuring just 4 by 6 feet can host dozens of plants when you grow upwards instead of spreading outward.
Consider the math: a traditional container taking up one square foot of floor space might hold a single plant. That same square foot of wall space, when used vertically across six feet of height, can accommodate six or more tiers of plants, potentially hosting 12-24 individual plants depending on your system design. You transform unused vertical real estate into productive growing space without sacrificing the floor area you need for furniture, movement, or other uses.
Enhanced Accessibility for All Gardeners
Raising planters off the ground makes gardening easier for individuals with mobility issues, dramatically reducing the need for bending, kneeling, or working from uncomfortable positions. Harvesting herbs or tending plants at waist or eye level proves far more comfortable than crouching over ground-level containers or bending repeatedly to reach low plants.
This accessibility benefit extends to people recovering from injuries, seniors who want to continue gardening without strain, and anyone who finds traditional ground-level gardening physically challenging. Vertical systems place plants where you can easily reach them without physical stress, making gardening more sustainable as a long-term hobby regardless of age or physical condition.
Stunning Visual Impact and Aesthetic Value
A living green wall adds stunning visual interest to otherwise bland spaces that might otherwise consist of nothing but concrete, brick, or siding. It can create a focal point that draws the eye, screen unsightly views of neighboring buildings or parking areas, or simply bring vibrant life and color to concrete jungles that desperately need the softening influence of plants.
Vertical gardens also allow creative expression through design choices. You can create geometric patterns with different plant colors, arrange herbs in a functional kitchen display, build artistic installations using unusual containers, or design cascading walls of flowering plants. The vertical canvas offers design possibilities that horizontal planting simply cannot match in small spaces.
Higher Yields from Optimized Space
By maximizing space and potentially optimizing light exposure for each plant, vertical systems can sometimes lead to greater yields of herbs, greens, or small fruits compared to traditional containers occupying the same footprint. Each plant receives its own designated growing pocket rather than competing for root space in a shared container, and you can position light-loving plants higher and shade-tolerant varieties lower to maximize growing conditions for both.
The increased air circulation around vertically arranged plants also reduces disease pressure that can build up when plants sit too closely together horizontally. Healthier plants naturally produce better yields, making vertical arrangements particularly efficient for food production in limited spaces.
Improved Air Quality and Microclimate Benefits
Plants naturally filter air, absorbing carbon dioxide and releasing oxygen while also removing certain airborne toxins through their normal biological processes. A concentration of plants in a vertical garden can contribute to cleaner air in the immediate vicinity, creating a healthier breathing environment in your home or balcony area.
These living walls can also provide shade and evaporative cooling, slightly modifying the microclimate on a hot balcony or patio. The temperature around a well-watered vertical garden can feel several degrees cooler than surrounding concrete or metal surfaces that absorb and radiate heat. This cooling effect makes outdoor spaces more comfortable during summer months.
Natural Privacy Screens
Strategically placed vertical gardens act as natural privacy screens on balconies or patios, shielding you from neighbors or busy streets while adding beauty rather than installing artificial barriers. A tall trellis covered in vining plants or a multi-tiered vertical planter creates visual separation without the institutional feel of solid fencing or the expense of privacy panels.
This privacy function proves particularly valuable in urban settings where balconies often face other balconies directly, or where ground-level patios open onto sidewalks or parking areas with heavy foot traffic.
Opportunities for Creativity and Sustainability
Many DIY vertical gardening ideas involve repurposing materials like pallets, bottles, or gutters, promoting sustainability while allowing for unique, personalized designs that reflect your style and resourcefulness. This upcycling approach reduces waste, saves money, and creates conversation pieces that tell stories about creative problem-solving and environmental consciousness.
Each vertical garden becomes a unique creation rather than a generic store-bought product, reflecting your personal aesthetic choices, problem-solving approaches, and the specific materials you had available. This individuality adds character to your space in ways that mass-produced planters never could.
Share your space challenge: What’s the biggest obstacle preventing you from gardening right now—lack of floor space, weight restrictions on your balcony, concerns about watering access, or something else entirely? Understanding your specific limitation helps you choose the vertical gardening solution that will work best for your situation. Tell us in the comments what space challenge you’re working to overcome!
Planning Your DIY Vertical Garden Successfully
Successful vertical gardening starts with thoughtful planning rather than impulsive purchasing or building. Before you grab your tools or head to the hardware store, take time to assess your space and needs carefully. Answering key questions now prevents frustration later and helps you choose the right DIY project that will actually thrive in your specific conditions.
Location Assessment and Sunlight Mapping
Where your vertical garden lives determines almost everything else about its success or failure. Consider these critical factors before committing to a location or design.
Start by identifying available surfaces. Do you have a sturdy wall, a balcony railing, a privacy fence, or just floor space for a freestanding vertical structure? The surface dictates the types of systems you can install—hanging, wall-mounted, or freestanding—and rules out options that simply won’t work with your architecture or rental restrictions.
Sunlight exposure requires the most careful observation and represents the single most important factor determining what you can successfully grow. Observe your intended location throughout an entire day, noting how many hours of direct sunlight it receives. This process, often called sun mapping, reveals patterns you might miss with a casual glance.
Full sun locations receive six or more hours of direct sunlight daily. These spots prove ideal for most vegetables like tomatoes, peppers, and cucumbers if space allows, many herbs including basil, rosemary, and thyme, and flowering annuals such as petunias and marigolds. These sun-loving plants will struggle and produce poorly without adequate light.
Partial sun or shade spots get four to six hours of direct sunlight, or dappled light filtering through tree canopy or neighboring buildings all day. These locations suit leafy greens like lettuce, spinach, and kale, some herbs including mint, parsley, and chives, and shade-tolerant flowers such as begonias and impatiens. Many people overestimate their light levels, so track actual direct sun carefully.
Full shade areas receive less than four hours of direct sunlight daily. These prove challenging for most edible plants, though some foliage plants, ferns, and certain herbs like mint might tolerate these conditions. Grow lights become necessary for indoor shade spots if you want to grow herbs or vegetables successfully.
Wind and rain exposure also impact your vertical garden significantly. Balconies on upper floors or exposed walls face strong winds that dry out plants faster and can damage delicate foliage or knock over freestanding structures. Consider whether the location offers some natural protection or if you need to choose hardier plants or provide windbreaks. Heavy rain can overwhelm drainage in some structures or waterlog soil, while sheltered locations under roof overhangs might require more frequent manual watering since rain never reaches them.
Developing Your Watering Strategy
Vertical gardens, especially those with smaller individual planting pockets, can dry out with surprising speed. Planning your watering approach before you build or plant prevents the frustration of watching plants wilt because your watering system proves impractical or too time-consuming to maintain.
Manual watering requires regular checking, often daily during hot weather, and careful attention to ensure each plant receives adequate moisture without waterlogging lower levels where water drips from plants above. A watering can with a long, narrow spout or a hose with a gentle shower setting works well for most vertical systems. This approach costs nothing beyond the watering tool but demands consistent time and attention.
Drip irrigation offers a more efficient, automated option, especially for larger systems or gardeners with busy schedules. A simple drip irrigation kit uses thin tubes and adjustable emitters to deliver water slowly and directly to the base of each plant. This conserves water by eliminating evaporation and runoff, ensures consistent moisture levels that plants prefer, and can operate on a timer for full automation. Kits connect easily to a standard hose bibb and often include everything needed for installation. This investment pays off quickly in time saved and improved plant health, particularly for systems with many individual plants.
Self-watering systems incorporate reservoirs that wick water up to plant roots through capillary action, reducing watering frequency dramatically. Some commercial vertical planters include this feature, and certain DIY designs can incorporate simple self-watering principles using reservoir trays or bottom-watering chambers. These work particularly well for indoor systems or for gardeners who travel frequently.
Drainage represents an absolute non-negotiable requirement. Every container or pocket in your vertical system must have drainage holes to prevent water from pooling around roots and causing root rot that will kill plants quickly. Plan carefully where excess water will go—will it drip onto the ground below, onto a balcony floor or patio, or do you need a collection tray to prevent water damage or complaints from neighbors below? Some locations simply cannot accommodate systems that drip excess water, ruling out certain designs in favor of others with better water control.
Structural Support and Weight Considerations
Soil, water, and plants add significant weight that many people underestimate until their mounting hardware fails or their structure tips over. Ensuring your chosen location and mounting method can safely handle the load prevents dangerous failures and property damage.
Wall strength varies dramatically. Mounting directly to solid brick or concrete walls works well with appropriate masonry anchors. For drywall or exterior siding, you must locate wall studs and use heavy-duty anchors or mounting hardware specifically designed for the expected weight. Never assume drywall can support significant weight without proper anchoring—vertical gardens can easily exceed 50-100 pounds when fully watered, and inadequate mounting will fail eventually, often catastrophically.
Balcony railings must prove structurally sturdy enough to support the weight of hanging planters or systems designed to clamp onto them. Check building codes or strata rules before attaching anything to railings, as some buildings prohibit modifications or attachments that could pose safety risks or cause damage. Weight limits vary significantly based on railing construction materials and methods.
Mounting hardware should always use weather-resistant screws, hooks, brackets, or wires suitable for outdoor use and rated for weights exceeding your anticipated load. Stainless steel or galvanized hardware resists rust that would weaken connections over time. Budget hardware fails, and the cost difference between adequate and excellent mounting hardware rarely exceeds a few dollars—invest in quality components that won’t fail.
Freestanding structures like A-frames or tiered planters require stable bases unlikely to tip over, especially in windy conditions that can catch vertical surfaces and create leverage. Weighting the bottom tier with stones or sandbags can dramatically improve stability. Position freestanding units against walls when possible for additional support and wind protection.
Selecting the Right Plants for Success
Choose plants suited to your light conditions, climate, and the specific vertical garden system you’re building. Putting sun-loving basil in a shady spot or trying to grow sprawling pumpkins in a small pocket guarantees disappointment regardless of how well you build your structure.
Size matters significantly in vertical systems. Choose plants with relatively small root systems that won’t quickly outgrow their containers and become root-bound. Dwarf varieties of vegetables often prove much more suitable than standard cultivars. A cherry tomato variety bred for container growing succeeds where a traditional beefsteak tomato would fail miserably in the same space.
Growth habit affects both aesthetics and practicality. Trailing plants like lobelia, sweet potato vine, and some strawberry varieties look beautiful cascading down from upper tiers, creating waterfall effects. Upright plants like herbs and lettuce work well in individual pockets without sprawling into neighboring plants. Vining plants including beans, cucumbers, and peas need trellis support integrated into the system from the beginning to prevent tangled chaos.
Light and water needs should match across plants sharing the same watering zone. Don’t place sun-loving basil next to shade-tolerant ferns if they share plumbing in a drip system, as their conflicting needs for water and light make proper care impossible. Group plants with similar requirements together for easier management.
Good choices for beginners include herbs like mint, chives, oregano, thyme, and parsley that tolerate various conditions and forgive minor mistakes. Leafy greens including lettuce mixes, spinach, and arugula grow quickly and produce abundantly in small spaces. Strawberries produce fruit in compact spaces and offer attractive foliage. Edible flowers such as pansies and nasturtiums add color while providing garnishes. Resilient succulents thrive if drainage is excellent. Annual flowers like petunias, lobelia, and alyssum provide reliable color throughout the season.
Material Selection for Durability
Consider longevity and safety when selecting materials for your DIY project, as these choices affect how long your vertical garden lasts and whether it remains safe for growing edible plants.
Wood offers natural aesthetics that blend beautifully with plants. Use naturally rot-resistant woods like cedar or redwood when budget allows, or choose heat-treated pallet wood marked “HT” if using reclaimed materials. Avoid chemically treated pallets marked “MB” as these contain methyl bromide that can leach into soil. Sealants can extend wood lifespan significantly, but choose non-toxic options if growing edibles, as some wood treatments contain chemicals you don’t want near food plants.
Plastic materials include recycled bottles, PVC pipes, vinyl gutters, and commercially made grow pockets. These prove lightweight, durable, and often inexpensive. Ensure plastics are food-safe by checking recycling codes—numbers 1, 2, 4, or 5 generally indicate food-safe plastics if you’re growing edibles. UV resistance varies dramatically, and some plastics become brittle after extended sun exposure, developing cracks that lead to failures. Quality varies widely in plastic products.
Metal components like galvanized gutters or tin cans resist rust well. Metal can get extremely hot in direct sun, potentially stressing roots or even causing burns to leaves that touch heated surfaces. Ensure adequate drainage as standing water can still cause problems despite rust resistance. Painted metal needs food-safe paint if used for edibles.
Fabric pockets made from geotextile material, like those in shoe organizers or specialized grow bags, offer excellent drainage and root aeration but dry out very quickly, sometimes requiring twice-daily watering during hot weather. Lightweight fabric makes installation easy but durability varies dramatically with fabric quality—cheap options might last only one season while quality grow bags endure for years.
Inspiring DIY Vertical Gardening Ideas to Build
Now for the exciting part—actual projects you can build! These popular and achievable DIY vertical gardening ideas suit small spaces and various skill levels. Choose the option that best fits your available skills, budget, physical space, and aesthetic preferences.
The Classic Pallet Garden

This represents one of the most iconic DIY vertical garden projects that launched thousands of urban gardens. A wooden pallet stands upright, landscape fabric creates pocket troughs on the back and bottom, and plants insert into the slatted openings on the front. The rustic aesthetic appeals to many gardeners while providing substantial growing space.
Materials You Need
Gather a wooden pallet—critically important: use only heat-treated pallets marked “HT” and avoid chemical-treated ones marked “MB,” especially when growing edibles. You need heavy-duty landscape fabric or weed barrier material, a heavy-duty staple gun with plenty of staples, scissors or a utility knife, measuring tape, quality potting soil suitable for containers, and your chosen plants or seeds. Optional additions include sandpaper, exterior paint or non-toxic sealant if growing edibles, and mounting brackets or screws if attaching to a wall.
Building Your Pallet Garden
Start by preparing the pallet carefully. Inspect every surface for loose nails that could cause injury or splintered wood that needs smoothing. Remove hazards or hammer down protruding nails flush with the surface. Sand rough spots if desired for a finished appearance. Apply paint or sealant now if using, allowing complete drying before proceeding.
Measure and cut landscape fabric strategically. Decide which side faces the wall as your back. Measure the pallet width and determine the depth needed for planting troughs between slats. Double this depth measurement so fabric can go down and up, creating an actual pocket. Cut multiple fabric pieces to cover the back and bottom sections between main support beams.
Create planting pockets by laying the pallet face down. Start with the bottom opening first. Fold landscape fabric in half lengthwise to double its strength and load-bearing capacity. Staple one edge securely along the inside back edge of the bottom slat, using many staples. Pull fabric down across the bottom opening and up the inside front edge of the same opening, creating a trough shape. Staple the other edge securely to the inside front surface. Ensure fabric stays taut enough to hold soil weight but has slight give. Use far more staples than you think necessary—this is where most failures occur when people skimp on staples.
Continue upward, repeating this process for each horizontal opening you intend to plant, working methodically up the pallet. Each fabric trough should overlap slightly with the one below it on the inside to prevent gaps where soil might escape.
Cover the entire back by cutting a large landscape fabric piece covering the full back of the pallet over the pockets you made plus the bottom opening. Staple this backing securely around all edges, creating a completely sealed backing. This backing prevents soil from falling out and provides crucial structural support. Double-check that every edge has solid stapling with no gaps.
Position the pallet carefully and fill with soil. Stand the pallet upright in its final location, leaning against a wall or mounting securely with brackets. Remember it becomes extremely heavy once filled. Fill pockets from top openings with quality potting mix. Gently pack soil down, ensuring mix fills all fabric troughs completely. Water thoroughly to help soil settle, then top up soil levels as settling creates depressions.
Plant by making small slits in landscape fabric at the front of each trough where you want plants. Gently insert plant starts into soil pockets through pallet slats or the slits you created. If starting from seed, follow seed packet instructions for depth and spacing. Water again gently after planting to settle soil around roots.
Advantages and Limitations
Pallet gardens use free or very cheap materials often available from businesses discarding pallets. They offer large planting areas that can accommodate many plants in a small footprint. The rustic aesthetic appeals to many tastes and complements outdoor spaces well. The structure proves relatively sturdy when properly constructed.
However, these gardens become quite heavy when fully planted and watered. Careful pallet selection proves critical as treated wood poses health risks. Soil dries out quickly in the exposed pockets. Watering lower levels evenly becomes tricky without drip irrigation as water tends to run down the front rather than soaking into lower pockets.
Best plants include herbs, lettuce, strawberries, succulents, and shallow-rooted annual flowers like alyssum and lobelia. Avoid plants requiring deep root systems or those that grow large.
Also Read: A UK Guide to Choosing Benches Garden Bench Styles
Gutter Garden for Horizontal Growing

Rain gutter sections capped at ends, filled with soil, and mounted horizontally create sleek, space-efficient planters. Install them individually or tier them in cascading arrangements that allow upper gutters to partially water lower ones.
Gather These Materials
Purchase vinyl or metal rain gutters in standard K-style profiles, matching gutter end caps, gutter mounting brackets or hangers, screws suitable for your mounting surface in exterior grade, a drill with bits for drainage holes and pilot holes, silicone sealant optionally for extra waterproofing at caps, hacksaw or tin snips if cutting gutters to custom lengths, a level for proper alignment, potting soil, and your chosen plants.
Installation Steps
Cut gutters to desired lengths if needed using a hacksaw for vinyl or tin snips for metal. Smooth any rough edges with sandpaper to prevent injuries and make end caps fit properly.
Attach end caps securely to both ends of each gutter section. Follow manufacturer instructions as some snap into place while others require sealant or screws for watertight fits. Minor leakage rarely causes problems unless positioned above sensitive areas.
Drill drainage holes by turning gutter sections upside down. Drill several small holes approximately 1/4 inch or 6mm diameter along the bottom of each section, spacing them every 6-12 inches. This drainage proves crucial for preventing waterlogged soil that kills roots.
Plan mounting locations carefully. Decide on placement on your wall, fence, or railing. If creating tiers, plan spacing between rows ensuring upper tiers won’t completely block sunlight from lower tiers. Use a level to mark where mounting brackets install to ensure gutters sit horizontally rather than tilting.
Install mounting brackets securely to walls or fences using appropriate screws. Ensure they anchor into studs or solid material when necessary for weight support. Follow bracket spacing recommendations for the gutter type you selected.
Mount gutters by placing prepared sections into mounted brackets. They should snap or clip securely into place with proper alignment.
Fill with soil by adding quality potting mix to gutter troughs, leaving approximately one inch of space at the top for watering without overflow.
Plant your chosen herbs, greens, or flowers directly into soil. Water gently, watching for proper drainage through the holes you drilled.
Pros and Cons
Gutter systems use relatively inexpensive, readily available materials from any hardware store. They create neat, clean appearances that suit modern aesthetics. They work well for shallow-rooted plants and prove easy to water, especially single rows. Multiple gutters create impressive growing capacity in minimal space.
Limited soil depth restricts plant choices to varieties with shallow roots. Metal gutters can get dangerously hot in full sun, potentially cooking roots. Installation requires secure mounting that can handle cumulative weight. Plastic gutters can become brittle over time with UV exposure, eventually cracking.
Best plants include lettuce, spinach, radishes, strawberries, herbs like chives, oregano, and thyme, alyssum, lobelia, and succulents that appreciate the excellent drainage.
Upcycled Plastic Bottle Tower

Large plastic bottles like 2-liter soda containers get modified and stacked vertically, creating individual planting pockets in a space-saving tower. This project turns trash into treasure while costing almost nothing.
Collecting Your Supplies
Gather clean plastic bottles with labels removed—2-liter size works perfectly, and quantity depends on desired tower height. You need strong scissors or a utility knife for cutting plastic, a drill or soldering iron for making drainage and hanging holes, strong wire or rope for hanging OR a wooden dowel or metal rebar for central support, washers if using central support method, potting soil, and small plant starts or seeds.
Building the Tower
Prepare bottles by cutting the bottom off each one about 1-2 inches up from the base. Keep bottle caps ON for now on all bottles except the very bottom one in your tower.
Create planting windows optionally but recommended for better access and plant health. Cut small openings on bottle sides where plants will grow outward. Leave enough structural plastic for rigidity so bottles don’t collapse under soil weight.
Make drainage holes in every bottle cap EXCEPT the very bottom bottle by carefully piercing small holes using a drill or heated tool. These allow water to drip gradually down to bottles below.
Make hanging holes near the top rim of the TOP bottle only—two or three sturdy holes for threading hanging wire or rope.
Assemble your tower by starting with the BOTTOM bottle with cap removed and bottom cut off. Fill it partway with soil. Take the NEXT bottle up with cap on with drainage holes and bottom cut off. Invert it and carefully push the neck with cap into the open top of the bottom bottle. It should fit snugly. Add soil to this second bottle. Repeat this stacking process, inserting each bottle neck into the open base of the one below while adding soil as you build upward.
Plant small seedlings or seeds into soil through side windows if you made them, or into the top of each bottle section before stacking the next bottle above it.
Attach a hanger by threading strong wire or rope through holes in the top bottle and securing it for hanging from a sturdy hook or beam that can support the full weight.
Water slowly from the top bottle. Water gradually drips down through drainage holes in caps to lower levels, though you should check that lower levels receive adequate moisture.
Benefits and Drawbacks
This project represents excellent use of recycled materials that would otherwise create waste. Costs remain extremely low, often just the price of soil and plants. The lightweight design hangs easily from modest support structures. The modular design allows easy height adjustments by adding or removing bottles.
Small planting pockets limit plant size significantly—only compact varieties succeed. Plastic degrades in sunlight over time, eventually becoming brittle and cracking. Watering requires careful attention to ensure even distribution since water naturally favors running down the outside. Aesthetics might not appeal to everyone as the project clearly shows its recycled origins.
Best plants include herbs, especially trailing varieties like thyme and oregano, small lettuce varieties, strawberries, and small annual flowers that tolerate confined roots.
Which project speaks to you? Are you drawn to the rustic charm of pallet gardens, the clean lines of gutter systems, or the resourcefulness of bottle towers? Your personal style and available materials often guide you toward the right choice. Share which vertical garden design you’re most excited to build and what appeals to you about that particular approach!
Fabric Shoe Organizer Garden

An over-the-door fabric shoe organizer transforms instantly into a multi-pocket vertical planter with zero construction required. This represents perhaps the easiest entry point into vertical gardening for complete beginners or renters who cannot modify walls.
What You Need
Purchase a fabric shoe organizer made of sturdy, preferably breathable canvas or non-woven fabric—avoid clear plastic fronts that create heat buildup. Get strong hooks or a mounting bar rated for the weight, screws and anchors if mounting to a wall rather than hanging from a door, potting soil, and small plant starts. Optional additions include a grommet kit to reinforce hanging holes and additional landscape fabric to line pockets if the material feels thin.
Quick Setup Process
Prepare the organizer by inspecting all hanging holes. Reinforce weak spots with metal grommets using a simple grommet kit if needed. Line pockets with extra landscape fabric if the material feels flimsy or too thin to support soil weight.
Ensure drainage exists since most fabric organizers feature breathable material allowing excess water to weep through gradually. If fabric seems very dense or waterproof, carefully poke a few small drainage holes in the bottom of each pocket.
Mount securely by hanging the organizer from sturdy hooks attached to a wall, fence, or solid structure. Ensure hooks and structure can support significant weight when filled with wet soil and plants. Use appropriate wall anchors if mounting to drywall rather than solid surfaces.
Fill pockets carefully with quality potting mix, leaving room at the top of each pocket for watering without immediate overflow.
Plant by gently placing one small plant start into each pocket. Firm soil around roots to provide stability.
Water each pocket gently but thoroughly. Expect water to drip from upper pockets onto lower ones, with excess water eventually dripping from bottom pockets. Plan accordingly for what sits underneath.
Advantages and Challenges
Setup takes minutes with zero tools or construction skills required. Cost remains very low for the organizer itself. The lightweight design suits walls that cannot support heavy structures. Many planting pockets fit in a tiny footprint. Good root aeration through breathable fabric promotes plant health.
Fabric pockets dry out extremely quickly, sometimes requiring twice-daily watering during hot weather. Durability varies dramatically—cheap organizers might last one season while quality ones endure longer. Limited soil volume per pocket restricts plant choices. Dripping during watering can create messes on floors or furniture below.
Best plants include herbs, lettuce, strawberries, carefully managed succulents if you can control watering frequency, and small annual flowers like alyssum and lobelia.
Mason Jar Herb Garden

Glass mason jars mounted individually or onto a wooden board create attractive small planters ideal for an indoor kitchen herb garden near a sunny window. The clear glass allows you to monitor soil moisture and adds farmhouse charm to any kitchen.
Supplies to Gather
Collect mason jars in pint or quart sizes, pipe clamps or hose clamps sized to fit snugly around your jars, a piece of wood board cut to desired size, short screws that penetrate wood without poking through the front, a screwdriver, picture hanging hardware rated for heavy weight OR screws and anchors for direct wall mounting, small pebbles or gravel for drainage layers, activated charcoal optionally to keep soil fresh, potting soil, and herb plants or seeds. Optional additions include paint or stain for the wood board.
Assembly Instructions
Prepare the board by sanding until smooth. Apply paint or stain if desired and allow complete drying.
Position clamps by arranging pipe clamps on the board where you want jars to sit. Ensure even spacing that accommodates your jar size.
Attach clamps carefully by screwing through the metal band (not the tightening mechanism part) into the wood. Use screws providing secure attachment without penetrating the front of the board.
Add hanging hardware to the back of the board using heavy-duty picture hanging equipment OR pre-drill holes for direct wall mounting later.
Prepare jars for planting since jars lack drainage holes that containers normally need. Place a 1-inch layer of pebbles or gravel at the bottom of each jar to create drainage space. Optionally add a thin activated charcoal layer on top of pebbles to filter water and prevent odors in this closed system.
Add soil and plants by filling jars with potting soil, leaving space at the top. Plant your herbs at appropriate depths.
Mount jars by carefully sliding each planted mason jar into a pipe clamp on the board. Tighten the clamp screw mechanism until jars stay firmly in place without overtightening that could crack glass.
Mount the board on your wall using picture hardware or direct mounting screws with anchors appropriate for your wall type.
Water very carefully since no drainage exists. Water sparingly, aiming only to moisten soil without saturation. Tip jars slightly to check if water pools excessively in the pebble layer. Overwatering causes problems quickly in containers without drainage.
Pros and Cons
The attractive, customizable appearance suits various décor styles. Perfect for indoor herbs kept easily accessible in kitchens. Uses common materials found in most homes or hardware stores. Keeps fresh herbs literally within arm’s reach while cooking.
Lack of drainage demands very careful watering discipline that some gardeners find challenging. Limited root space restricts plant choices and growth. Glass can break if mishandled during mounting or cleaning. Pipe clamps rust over time unless stainless steel, potentially staining walls.
Best plants include small herbs tolerating slightly restricted roots and careful watering: chives, mint, oregano, parsley, thyme, and basil though it may need repotting sooner due to its vigorous growth.
Leaning Ladder Planter

A freestanding A-frame or leaning ladder structure holds multiple planter boxes or pots on its rungs or shelves, creating a vertical display without wall mounting. Build from scratch with basic lumber or repurpose an old wooden ladder for instant vertical space.
Materials Needed
Gather wood boards such as 1×4 or 1×6 lumber for legs and rungs or shelves, exterior-grade wood screws, a saw, a drill, measuring tape and pencil, a level, planter boxes or pots, and optionally hinges for A-frame construction or exterior paint and sealant.
Building Your Ladder
Cut legs by measuring and cutting two long wood pieces for main vertical supports. Angle bottom ends slightly so they sit flat on the ground when leaned against a wall.
Cut rungs or shelves in several pieces wide enough to securely hold your chosen planter boxes or pots. Consider making lower shelves slightly longer and wider than upper ones for stability and visual appeal.
Assemble the ladder by laying two legs parallel on a flat surface. Position rungs or shelves between legs at desired intervals. Ensure everything stays level. Pre-drill pilot holes and attach rungs to legs using exterior wood screws that create secure connections.
Finish optionally by sanding rough edges smooth. Apply exterior paint or sealant if desired and allow complete drying.
Position and plant by leaning the ladder securely against a sturdy wall or fence. Place your planter boxes or pots already planted and filled with soil onto rungs or shelves. Ensure they sit securely without risk of falling.
An A-frame variation involves building two such ladder sides and connecting them at the top with hinges or fixed screws, creating a freestanding structure that doesn’t require wall support. This expands placement options but requires more materials and slightly more complex construction.
Benefits and Limitations
Freestanding options don’t require wall mounting or permission from landlords, making them perfect for renters. Customizable size and number of tiers adapt to your exact space. Allows use of standard pots or planters with excellent drainage options. Creates attractive vertical displays that add character to any space.
Takes up more floor space than wall-mounted alternatives, which might matter in very tight quarters. Requires basic woodworking skills and tools that beginners might lack. Repurposed ladders need careful stability checks before trusting them with plant weight.
Best plants include almost anything suitable for containers depending on pot size: herbs, greens, flowers, strawberries, and even dwarf varieties of peppers or tomatoes on lower, larger shelves that can support bigger containers.
Trellis or Wall Mesh Garden
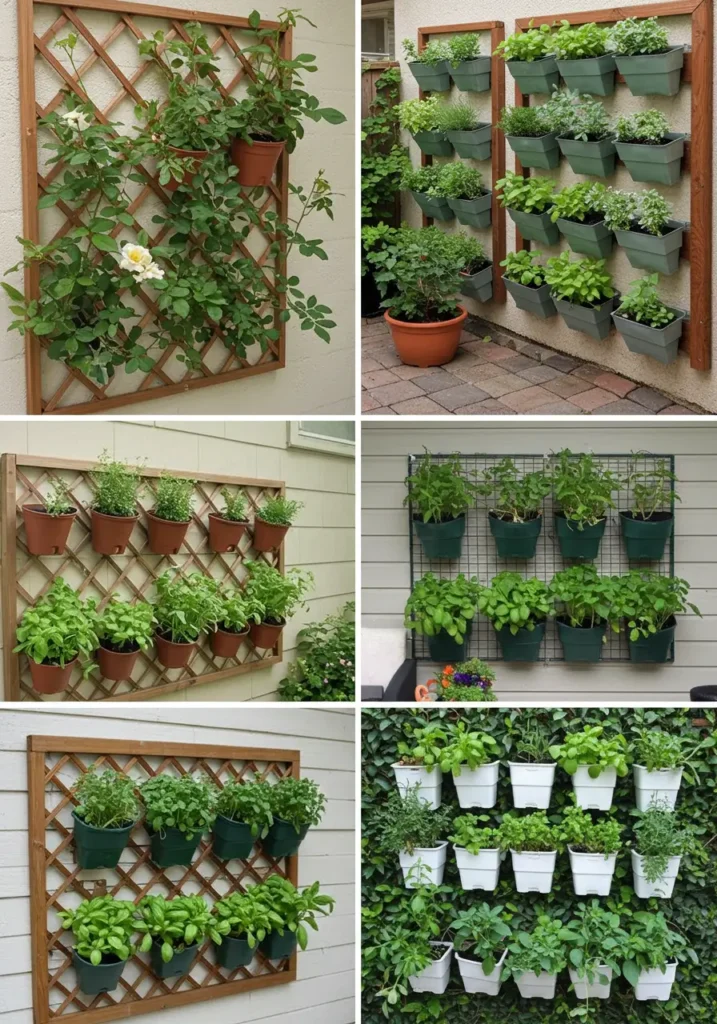
A trellis, wire mesh panel, or cattle panel mounts slightly off a wall or fence, creating a framework for hanging pots with hooks, attaching specialized clip-on planters, or training vining plants grown from containers at the base. This versatile system adapts to many plant types and growing styles.
Gather Your Materials
Purchase a trellis panel in wood or metal, wire mesh panel, or cattle panel in a size fitting your space. Get mounting hardware including spacers or blocks to hold the panel off the wall for air circulation, and screws or anchors appropriate for your wall type. Acquire pots with wire hangers OR clip-on planters OR standard pots for base planting. Include zip ties, twine, or plant clips for training vines, and your chosen plants—hanging or trailing types, vining varieties, or standard plants in attached pots.
Installation Process
Mount the trellis or mesh securely to your chosen wall or fence using appropriate screws and anchors that match your surface material. Crucially, use spacers such as small wood blocks between the panel and wall to create an air gap for circulation and room for hooks and clips to attach. Ensure mounting provides solid support for the cumulative weight of soil, water, and plants.
Prepare planters based on your system. Standard pots with wire hangers need secure hangers that won’t fail. Clip-on planters need functioning mechanisms checked before planting. Vining plants grow from large containers placed at the trellis base.
Attach planters or plant vines by hanging pots onto the trellis grid or clipping on specialized planters. Arrange them considering aesthetics and light exposure so plants don’t unnecessarily shade each other. Plant vining varieties like beans, cucumbers, peas, or some tomatoes in base containers filled with quality soil.
Train vines as they grow by gently guiding them onto the trellis framework using twine, loosely applied zip ties that won’t cut into growing stems, or reusable plant clips designed for this purpose.
Water individual pots as needed, checking each one since they dry at different rates based on exposure and plant size. Base containers for vines require regular watering as vining plants develop extensive root systems and leaf surface area.
Pros and Cons to Consider
Highly customizable layouts allow creative arrangements that evolve as you add or remove plants. Excellent support for vining plants that need vertical growing space. Good air circulation around plants reduces disease pressure. Can create impressive full green wall effects. Uses standard pots that you might already own.
Requires secure mounting capable of supporting significant weight without pulling away from walls. Cost of quality trellis or mesh panels varies but can be substantial. Individual pots still need regular watering attention. Weight calculations must account for many pots full of wet soil and plants.
Best plants include vining vegetables like pole beans, cucumbers, peas, and indeterminate tomatoes that climb naturally. Trailing flowers cascade beautifully. Herbs in hanging pots stay accessible. Strawberries in hanging pots produce fruit at eye level for easy harvesting.
Essential Care and Maintenance Tips
Building your vertical garden represents just the beginning. Keeping plants thriving in these systems requires understanding their unique needs compared to traditional ground-level gardens. Vertical arrangements create specific challenges and opportunities that affect how you care for your plants.
Watering Strategies for Vertical Systems
Vertical gardens typically dry out faster than traditional containers due to increased air exposure and limited soil volume. Developing consistent watering routines prevents the stress that comes from alternating between drought and flood conditions that many vertical gardens experience.
Check soil moisture daily during hot weather by inserting your finger into the soil at least one inch deep. If it feels dry at that depth, water thoroughly. Surface dryness alone doesn’t indicate actual water needs, as deeper soil often retains moisture while the surface appears parched.
Water thoroughly when you do water rather than giving frequent shallow drinks. Water should penetrate the entire root zone and begin dripping from drainage holes, ensuring roots throughout the container receive moisture. Shallow watering encourages shallow root development, creating plants more vulnerable to drought stress.
Consider watering times strategically. Early morning watering allows foliage to dry before evening, reducing disease risk from damp leaves overnight. It also ensures plants have moisture available during hot daytime hours when transpiration rates peak. Evening watering works if mornings prove impossible, but avoid wetting foliage if you can direct water to soil only.
Install drip irrigation for larger systems or busy schedules. Even basic systems dramatically improve consistency while saving time and water. Program timers to deliver water during optimal times without requiring your presence. This investment pays back quickly in improved plant health and reduced time spent with watering cans.
Group plants with similar water needs together when possible. Mixing drought-tolerant herbs with moisture-loving lettuce in the same watering zone creates management challenges as you either overwater the herbs or underwater the greens.
Fertilizing Container Plants
Vertical garden containers have limited soil volume, and frequent watering leaches nutrients more quickly than in ground beds. Regular fertilization becomes essential for sustained plant health and productivity rather than optional extra care.
Use balanced liquid fertilizers diluted according to package directions every two weeks during active growing season. Water-soluble fertilizers deliver nutrients quickly through both roots and foliage if you use foliar feeding methods. Organic options like fish emulsion or seaweed extract provide nutrients while building beneficial soil biology.
Slow-release granular fertilizers mixed into soil at planting time provide steady nutrition for several months. These work particularly well for long-season plants like herbs that remain in place for extended periods. Follow label rates carefully as overfertilization causes problems including excessive leafy growth at the expense of fruits or flowers.
Watch for nutrient deficiency signs including yellowing leaves, particularly on older growth, stunted growth despite adequate water and light, poor flowering or fruiting despite healthy foliage, or leaves with unusual colors like purple tints or pale green instead of vibrant green. These signals indicate plants need nutritional support.
Flush containers monthly by watering heavily until significant water flows from drainage holes. This removes accumulated salts from fertilizers that can build to toxic levels in containers, burning roots and causing mysterious plant decline.
Pest and Disease Management
Vertical gardens often experience fewer pest problems than ground-level gardens due to elevation and good air circulation, but problems still occur and require prompt attention before they spread through your planting.
Inspect plants regularly, checking both upper and lower leaf surfaces where pests often hide. Early detection allows easy hand-picking or targeted treatments before infestations explode. Look for aphids clustering on new growth, whiteflies that flutter when leaves are disturbed, spider mites creating fine webbing, caterpillars chewing leaves, and fungal diseases causing spots or powdery coatings.
Start with least-toxic controls like strong water spray to dislodge aphids and mites, hand-picking larger pests like caterpillars or beetles, insecticidal soap sprays for soft-bodied insects, and neem oil for various pests and some fungal issues. Escalate to stronger options only when gentler methods fail.
Prevent problems through good practices including adequate spacing for air circulation, avoiding overhead watering when possible to keep foliage dry, removing dead or diseased plant material promptly, and rotating annual plants rather than growing the same species in the same soil repeatedly.
Encourage beneficial insects by including flowering plants that attract predators like ladybugs, lacewings, and parasitic wasps that control pest populations naturally. Small flowers like alyssum planted among vegetables provide nectar sources for these allies.
Seasonal Adjustments and Winter Care
Vertical gardens in cold climates need special consideration as winter approaches since exposed containers freeze solid far more readily than ground soil that benefits from earth’s insulating mass.
Move portable systems indoors or to protected locations before first frost if you want to overwinter plants. Many herbs adapt well to indoor growing near bright windows during winter months, providing fresh flavoring year-round.
Empty and clean containers that won’t be used during winter. Soil left in containers can harbor pests and diseases while freezing and thawing cycles can crack or damage containers. Store empty containers in protected locations to extend their lifespan.
Insulate containers that must stay outdoors by wrapping them with burlap, bubble wrap, or specialized insulating wraps. Group containers together and mulch heavily around them to provide additional protection. Even with protection, most tender plants will not survive hard freezes in exposed containers.
Plan for succession planting in warm climates where year-round growing proves possible. As summer crops finish, replant with cool-season varieties to maintain productivity. Lettuce, kale, and many herbs thrive during mild winters in zones 8 and warmer.
What’s your biggest care challenge? Is watering consistency your struggle, or do pests seem to find your plants no matter what you do? Maybe fertilizing schedules confuse you, or you’re unsure how to prepare for winter in your climate zone. Sharing your specific maintenance challenge helps others learn from your experience and might prompt solutions you haven’t considered. What aspect of vertical garden care concerns you most?
Troubleshooting Common Vertical Garden Problems
Even well-planned vertical gardens encounter challenges. Understanding common problems and their solutions helps you respond quickly before minor issues become major failures.
Plants Wilting Despite Regular Watering
This frustrating problem often indicates root issues rather than insufficient water. Check for several possible causes before simply watering more frequently.
Poor drainage causes roots to suffocate in waterlogged soil, leading to wilt that looks identical to drought stress. Check drainage holes to ensure they remain open and functioning. Soil that stays soggy for days after watering indicates drainage problems requiring repotting with better soil mix or improving drainage holes.
Root-bound plants outgrow their containers, creating dense root masses that water runs through without being absorbed. Gently remove a wilting plant from its container to check roots. If you see solid root masses circling the container interior, the plant needs a larger container or root pruning and fresh soil.
Extreme heat causes wilting even in well-watered plants as transpiration exceeds water uptake. Provide temporary shade during heat waves using shade cloth or moving portable systems to shadier locations. Water more frequently during extreme weather.
Yellowing Leaves on Otherwise Healthy Plants
Yellow leaves signal several possible issues requiring different solutions, so diagnosis matters before treatment.
Nitrogen deficiency appears as yellowing of older, lower leaves first while new growth remains green. Plants look pale overall. This indicates the need for fertilization with a balanced or nitrogen-rich fertilizer following label directions.
Overwatering causes yellowing across the plant, often accompanied by soft, mushy stems or soil that smells sour or rotten. Reduce watering frequency, improve drainage, and consider repotting in fresh, well-draining soil if the problem is severe.
Natural aging causes lowest leaves to yellow and drop as plants mature, particularly fast-growing annuals. This normal process doesn’t require intervention unless it progresses rapidly up the plant.
Leaning or Falling Structures
Structural problems pose safety hazards and damage plants, requiring immediate attention to prevent complete failure.
Inadequate mounting causes walls-mounted systems to pull away from surfaces. Reinforce mounting using appropriate anchors for your wall type, ensuring fasteners penetrate studs or solid material rather than just drywall or siding. Add additional mounting points to distribute weight more broadly.
Top-heavy designs create instability in freestanding systems. Weight lower tiers with stones or position heavier containers at the bottom while keeping lighter ones at the top. Move tall structures against walls for additional support.
Wet soil dramatically increases weight beyond what dry soil weighs. Ensure mounting and structures can support fully watered plants, not just newly planted dry ones. Calculate weight allowances based on saturated conditions.
Uneven Growth Across Different Levels
Plants at different heights often show dramatically different growth rates due to varying conditions at each level.
Light differences cause the most variation. Upper levels typically receive more intense light than lower levels, especially in tiered systems where upper plants cast shade. Position sun-loving plants at the top and shade-tolerant varieties at the bottom. Rotate plants periodically if possible to even out light exposure.
Water distribution proves uneven in many vertical systems as water naturally flows downward. Upper levels may dry out quickly while lower levels stay too wet. Adjust watering techniques to deliver more water to upper levels and less to lower ones, or install drip emitters delivering appropriate amounts to each level.
Temperature varies by height as heat rises and upper levels face more direct sun exposure. Position heat-sensitive plants lower and heat-loving varieties higher. Monitor both levels separately to understand their different microclimates.
Maximizing Yield and Beauty in Your Vertical Garden
Once your vertical garden establishes successfully, optimize it for maximum productivity and visual appeal. Small adjustments create significant improvements in both harvest quantities and aesthetic impact.
Succession Planting for Continuous Harvest
Avoid the feast-or-famine cycle where everything matures simultaneously by staggering plantings across time. Plant small quantities of fast-maturing crops like lettuce, radishes, or herbs every two to three weeks rather than all at once. This provides continuous harvests over months instead of overwhelming abundance followed by nothing.
Replace finished plants immediately rather than leaving empty pockets. When you harvest the last of your spring lettuce, plant summer basil in that spot. As tomatoes finish in fall, replant with cold-hardy kale or chard. Keeping your vertical garden fully planted maximizes productivity from limited space.
Companion Planting in Vertical Systems
Pair plants strategically to improve growth and reduce problems. Place basil near tomatoes as they share similar cultural needs and basil may help deter certain pests. Grow lettuce in the shade cast by taller plants during hot weather, extending your harvest season. Include flowering herbs like oregano or thyme to attract beneficial insects that control pests naturally.
Avoid problematic combinations like planting aggressive spreaders next to slow growers, mixing plants with vastly different water needs in the same container, or crowding fast-growing plants next to those needing space to develop properly.
Regular Pruning and Harvesting
Harvest herbs frequently by pinching stem tips to encourage bushier growth and prevent flowering that reduces leaf production. Remove yellowing or dead leaves promptly to improve appearance and reduce disease risk. Pinch off flowers on herbs like basil unless you want seeds, as flowering signals the end of vigorous leaf production.
Train vining plants onto supports early in their growth rather than waiting until stems tangle and become difficult to manage. Use soft ties that won’t cut into growing stems and check regularly to ensure ties don’t become too tight as stems expand.
Adding Color and Texture Variety
Create visual interest by combining plants with different leaf colors, shapes, and textures. Mix deep green herbs with purple basil or burgundy lettuce varieties. Include trailing plants with cascading habits alongside upright growers. Add flowering plants for color pops among foliage.
Consider foliage color throughout the season, not just flowers. Many herbs, lettuces, and ornamental plants offer stunning foliage colors that provide interest even when flowers fade. Variegated varieties of mint, sage, or thyme add visual texture while providing the same culinary uses as solid green forms.
Taking Your Vertical Garden to the Next Level
Once you master basic vertical gardening, explore advanced techniques and creative expansions that push boundaries and increase both productivity and enjoyment.
Hydroponic and Aquaponic Vertical Systems
Soilless systems using nutrient solutions deliver food directly to roots, eliminating soil weight while often increasing growth rates. Vertical hydroponic systems range from simple Kratky method containers requiring no pumps to more complex recirculating systems with timers and pumps. These suit indoor growing particularly well as they eliminate soil mess while providing optimal nutrition.
Aquaponic systems combine fish tanks with vertical plant growing towers where fish waste provides plant nutrition while plants filter water for fish. These closed-loop systems fascinate many gardeners and produce both vegetables and potentially edible fish in remarkably small spaces, though they require more initial investment and learning.
Smart Technology Integration
Automated watering systems with soil moisture sensors detect actual water needs and irrigate only when necessary, preventing both drought and overwatering. These systems pay for themselves in water savings while dramatically improving plant health through optimal moisture management.
Grow lights expand possibilities for indoor vertical gardens where natural light proves insufficient. Modern LED grow lights provide full spectrum lighting at reasonable costs while generating minimal heat that might stress plants. Position lights 6-12 inches above plant tops and run them 12-16 hours daily for most vegetables and herbs.
Weather monitoring apps help you anticipate frost dates, heavy rain events, or extreme heat, allowing you to protect plants before damage occurs rather than reacting after problems develop.
Expanding Your System Over Time
Start small with one successful project rather than overwhelming yourself with an elaborate system requiring extensive time and resources. Master the basics with a simple gutter garden or shoe organizer before investing in complex structures.
Add modules gradually as your confidence grows. Build one pallet garden this year, add a trellis system next year, experiment with bottle towers the following year. This incremental approach spreads costs while allowing you to discover what works best in your specific conditions.
Document what works through photos and simple notes about planting dates, varieties that thrived or failed, and techniques that proved effective. This personal knowledge base becomes invaluable for improving results each season.
Conclusion: Your Vertical Garden Journey Begins
The beauty of DIY vertical gardening ideas lies in their accessibility—these projects don’t require extensive space, large budgets, or advanced skills. They simply need your willingness to experiment, learn from inevitable mistakes, and keep growing both plants and knowledge. Whether you choose the rustic charm of pallet gardens, the sleek efficiency of gutter systems, the resourcefulness of bottle towers, or any combination of vertical techniques, you’re joining a growing movement of urban gardeners who refuse to let limited space limit their connection to nature.
These vertical gardens provide more than fresh herbs or beautiful flowers. They create peaceful retreats from concrete surroundings, improve air quality in your immediate environment, connect you to natural growing cycles that modern life often obscures, and demonstrate that limitations often inspire creativity rather than prevent it. Your empty wall or cramped balcony holds potential you haven’t yet realized—potential for fresh basil that transforms simple meals, for strawberries picked at perfect ripeness, for flowers that brighten gray days, and for the quiet satisfaction of nurturing living things.
Start with one simple project that matches your current skill level and available resources. Don’t aim for perfection in your first attempt—aim for learning and the small joy of watching seeds sprout or transplants settle into their new vertical home. As you gain confidence, expand your systems, try new plants, and develop techniques that work specifically for your unique space and lifestyle. Each season brings new opportunities to improve, experiment, and harvest the results of your vertical growing efforts.
The vertical frontier awaits your creativity. That blank wall isn’t just empty space—it’s a canvas ready for your green ambitions. Those salvaged pallets, leftover gutters, or empty bottles aren’t just potential trash—they’re the building blocks of your productive garden. Your small space isn’t a limitation—it’s an invitation to grow upward rather than outward, maximizing every inch through clever design and determined gardening.
Now it’s your turn to take action and share your experience: Which DIY vertical gardening idea will you build first, and what plants do you dream of growing in your small space? What’s preventing you from starting today—lack of materials, uncertainty about your skills, or something else entirely? Will you commit to building your first vertical garden within the next month? Share your chosen project and your timeline below—declaring your intention publicly often provides the motivation to follow through, and your journey might inspire others facing similar space limitations to begin their own vertical gardens!
FAQs About DIY Vertical Gardening Ideas
How much weight will my balcony or wall actually support for a vertical garden, and how do I calculate this before my system fails or causes damage?
This critical question determines whether your vertical garden dreams remain safely attached to your building or end in disaster, potential injury, and property damage claims. Understanding weight calculations and load limits prevents catastrophic failures while giving you confidence to build appropriately sized systems.
Start by determining your structure’s load capacity through several approaches. For rental properties, check your lease agreement or building regulations as many specify weight limits for balcony railings or prohibit wall-mounted items exceeding certain weights. Contact your building management or strata council for official guidelines—they often have structural information residents cannot easily access.
For owned properties, consult building codes in your area as these specify minimum structural requirements, though actual capacity often exceeds minimums. Hire a structural engineer for professional assessment if you plan extensive vertical gardens, especially for large wall installations. This upfront cost prevents expensive repairs later. For typical residential construction, standard wood-framed walls support roughly 15-20 pounds per anchor point when mounted into studs using appropriate hardware, while concrete or brick walls support significantly more weight—often 50-100 pounds or more per properly installed masonry anchor.
Calculate your vertical garden weight accurately by weighing components separately. A gallon of water weighs approximately 8.3 pounds, and potting soil weighs roughly 75-100 pounds per cubic foot when dry but significantly more when saturated. Add container weight, plant weight including root balls, and structural weight of frames or boards. Total these for your fully watered system weight—not the lightweight, dry weight at construction time.
For example, consider a pallet garden measuring 4 feet by 3 feet by 6 inches deep. The volume calculates as 6 cubic feet of soil. At 100 pounds per cubic foot when wet, soil alone weighs 600 pounds. Add water weight in pockets, the wooden pallet itself, plants, and fabric, and you easily reach 650-700 pounds total. This system requires mounting into multiple wall studs using heavy-duty brackets rated for this load, distributed across at least 6-8 mounting points. Mounting this weight into drywall with basic anchors would fail catastrophically and potentially injure someone.
Distribute weight strategically by using multiple mounting points rather than one central attachment that creates a single failure point. Spread mounting points across the widest area practical to distribute load. For freestanding systems, ensure the base footprint provides adequate stability—a tall, narrow tower tips easily while a wider base remains stable. Weight the bottom tier if needed for stability.
Use appropriate hardware always. For wood studs, use lag bolts or heavy-duty wood screws at least 3 inches long penetrating studs. For drywall without stud access, use toggle bolts or expansion anchors rated for your total weight. For concrete or brick, use masonry anchors or concrete screws appropriate for the load. Never trust basic picture hooks or lightweight drywall anchors for vertical gardens.
Consider safety factors by engineering systems to support at least twice your calculated weight—this safety margin accounts for errors in calculation, unexpected water retention during heavy rain, or weight of snow accumulation in cold climates. If calculations suggest your wall or balcony cannot safely support your desired system, choose lighter alternatives like fabric pocket systems that weigh significantly less than pallet gardens, hydroponic systems that eliminate soil weight entirely, or freestanding options that rest on the ground rather than mounting to structures.
Test mounting before fully planting by mounting your system and gradually adding weight over several days while monitoring for any movement, cracking sounds, or signs of stress. This staged loading allows you to detect problems before full failure occurs. Never ignore warning signs like mounting hardware loosening, cracks appearing in walls, or systems leaning where they should be vertical—these indicate dangerous conditions requiring immediate action.
My rental agreement prohibits drilling holes or making permanent modifications. Can I still create a vertical garden, and what are my best options that won’t forfeit my security deposit?
Renters face unique challenges with vertical gardening projects, but numerous excellent options exist that provide substantial growing space without permanently modifying property or violating lease terms. Understanding renter-friendly approaches opens vertical gardening possibilities to millions of apartment dwellers who assume their living situation prevents gardening entirely.
Start by reading your lease agreement carefully and noting specific language about modifications. Some leases prohibit any wall mounting while others allow removable fixtures. Some restrict balcony weight limits or prohibit items attached to railings. Clarify ambiguous language with your landlord in writing—an email creates documentation protecting both parties. Many landlords approve reasonable requests when approached professionally, especially when you offer to restore the space to original condition upon move-out.
Freestanding vertical garden options require zero wall modification and can move with you to future residences. Leaning ladder planters rest against walls without mounting, supporting multiple tiers of container plants. A-frame structures stand independently, placing no load on walls while creating substantial vertical growing space. Commercial plant stands or multi-tiered pot holders purchased from garden centers require no assembly and leave no marks. Rolling plant carts add mobility, allowing you to move your entire garden for optimal light exposure or when moving residences.
Tension rod systems work like shower curtain rods, wedging between floor and ceiling or between walls without screws. Hang lightweight fabric pocket gardens or small pots from these tension-mounted rods. Verify weight limits as tension rods typically support only modest loads—usually 10-30 pounds maximum depending on the model.
Over-the-door systems using shoe organizers designed for doors require no modification beyond hanging the organizer over the door top. These provide dozens of planting pockets in spaces renters typically cannot utilize otherwise. Remove easily when showing the apartment or moving. Use on balcony doors, bedroom doors near windows, or closet doors if sufficient light exists.
Railing planters specifically designed for balcony railings clamp or hook onto railings without drilling. Dozens of styles exist accommodating various railing shapes and sizes. Check your lease regarding balcony items and verify weight allowances before loading railings heavily. Distribute weight along the railing length rather than concentrating it in one section.
Command strips and hooks offer surprisingly strong holding power for lightweight systems when used according to manufacturer directions. Heavy-duty versions support 5-15 pounds per strip when applied to smooth surfaces like painted walls, metal doors, or tiles. Create lightweight vertical gardens using hanging pots, small mason jars, or fabric pockets mounted with appropriate quantities of command hooks. Remove cleanly when moving by following proper removal instructions—slowly pull tabs straight down parallel to the wall rather than pulling outward.
Freestanding trellis panels in planter boxes create vertical growing space for vining plants without wall attachment. Large containers or planter boxes include integrated trellises tall enough for beans, peas, cucumbers, or flowering vines. Position these against walls for additional support if needed while the weight rests entirely on the floor or balcony surface.
Build relationships with neighbors and landlords by communicating your plans, showing respect for shared spaces, addressing any concerns about water dripping onto balconies below by using collection trays, maintaining neat appearances that enhance rather than detract from property aesthetics, and offering to share harvests with neighbors or landlords who might appreciate fresh herbs or vegetables.
Document original conditions by taking detailed photos of walls, balconies, and other areas where you’ll place vertical gardens before installation. These photos protect you when moving out if disputes arise about damage or modifications. Similarly, photograph your garden installations to show they involved no permanent modifications.
Plan for portability from the beginning if you might move during growing season. Choose systems that disassemble easily or mount on boards that can be unscrewed and moved as complete units. Avoid elaborate custom installations requiring significant time and effort to dismantle. Container-based systems transport most easily—you’re essentially moving potted plants rather than integrated garden structures.
Remember that thousands of renters successfully maintain productive vertical gardens using these non-permanent approaches. Your temporary housing situation doesn’t prevent gardening—it simply requires choosing appropriate methods that respect property while still fulfilling your desire to grow plants vertically in limited space.
How do I prevent my vertical garden from becoming a mosquito breeding ground, especially in systems that hold standing water or stay constantly moist?
This concern proves particularly valid as improperly managed vertical gardens can indeed create ideal mosquito breeding habitat, turning your beautiful green space into a source of biting insects that drive you indoors and potentially spread diseases. Understanding mosquito biology and implementing preventive measures keeps your vertical garden mosquito-free while maintaining healthy plants.
Mosquito biology reveals their vulnerabilities. Female mosquitoes lay eggs in standing water where larvae hatch and develop over 7-10 days before emerging as adult mosquitoes. They require still or very slow-moving water to complete this cycle—moving water disrupts their development. Importantly, they need water to remain standing for at least 7-10 days for larvae to mature, meaning temporary puddles that dry within a few days don’t support mosquito breeding despite appearing problematic.
Eliminate standing water completely as your primary defense. Ensure every container in your vertical garden features adequate drainage holes allowing excess water to escape rather than pooling. Check drainage holes regularly as they can become clogged with roots or soil particles over time. Poke clogged holes clear using a screwdriver or wire. Empty collection trays under containers at least twice weekly, more frequently during summer when mosquito breeding peaks. These trays commonly become breeding sites when water sits undisturbed for weeks.
Mosquitoes cannot complete their life cycle in water that drains away within a few days, so proper drainage essentially eliminates the breeding potential of your vertical garden even though you water regularly. The key involves ensuring water doesn’t pool in hidden spaces, container bases, or fabric pockets where it sits unnoticed for extended periods.
Inspect for hidden water accumulation weekly in leaf axils where leaves join stems on plants like bromeliads or birds of paradise that naturally collect water. Dump accumulated water from these spots. Check within bamboo stakes or hollow support poles where rain water might collect and sit unnoticed. Look in folded fabric, behind wall-mounted systems, or in any crevice where water might accumulate and remain undisturbed.
Add mosquito dunks or bits to collection trays or reservoirs that must hold standing water in self-watering systems. These biological control products contain BTI bacteria (Bacillus thuringiensis israelensis) that specifically kills mosquito and fungus gnat larvae while proving harmless to people, pets, plants, fish, bees, and other beneficial insects. One dunk treats standing water for 30 days, after which you replace it. This provides foolproof protection for unavoidable standing water situations.
Create water movement when using decorative water features or hydroponic systems with reservoirs. Mosquitoes struggle to breed in moving water, so even modest circulation from small pumps disrupts their breeding. Fountains or recirculating hydroponic systems rarely support mosquito breeding due to constant water movement, unlike still ponds or static reservoirs.
Encourage mosquito predators in your garden ecosystem. Dragonfly larvae eagerly consume mosquito larvae in any standing water that exists. Adult dragonflies, birds, bats, and spiders all feed on adult mosquitoes. Including small water features that attract dragonflies while following BTI treatment protocols provides biological control. Encourage birds to visit your balcony or patio by providing bird baths (change water every 2-3 days), feeders, or nesting opportunities.
Cover rain barrels or large water storage containers with fine mesh screening that prevents mosquitoes from accessing water surfaces to lay eggs while still allowing you to fill watering cans through small openings. Check screens regularly for holes or gaps that might allow mosquito access.
Time watering strategically by watering in early morning allowing surface water to dry during the day rather than remaining wet overnight when mosquitoes are most active. Avoid watering so heavily that water stands in collection trays or on soil surfaces for extended periods. Water only until soil is saturated and minor drainage occurs, not until collection trays fill completely.
Address nearby breeding sources beyond your immediate vertical garden. Clogged roof gutters, discarded containers, bird baths left unchanged, neighbors’ neglected pools or poorly managed gardens—all these contribute to local mosquito populations that will visit your space regardless of how well you manage your own garden. Politely address neighborhood sources when possible or contact local vector control authorities for persistent problems.
Monitor for larvae by checking any unavoidable standing water weekly for tiny wiggling larvae visible as small dark specs darting through water. Their presence indicates breeding is occurring and immediate action is required—dump the water, add BTI treatment, or eliminate the water source entirely.
Remember that vertical gardens properly designed with good drainage actually pose lower mosquito risk than ground-level gardens where water puddles more easily in low spots, garden beds, or around plant bases. The elevation and drainage inherent in most vertical systems work in your favor—you simply need to maintain these advantages through proper practices.
What’s the real cost comparison between DIY vertical gardens and buying pre-made systems, and at what point does the time investment in building DIY projects outweigh the cost savings?
This practical question addresses the actual economics and time investment of DIY vertical gardening versus purchasing commercial systems, helping you make informed decisions based on your personal situation rather than assumptions that DIY always saves money or that commercial systems always prove too expensive.
Analyze DIY costs realistically by tracking all material purchases rather than underestimating. A basic pallet garden requires landscape fabric costing $15-25, a staple gun if you don’t own one at $15-30, staples at $5-10, potting soil at $15-30 depending on quantity and quality, and plants at $20-60 depending on your choices. Even using a free pallet, you invest $70-155 before growing a single herb. Time investment includes sourcing a safe pallet, construction taking 2-4 hours for beginners, and learning curves involving mistakes that waste materials.
A gutter garden requires gutters at $10-15 per 10-foot section, end caps at $3-5 per pair, mounting brackets at $2-4 each, screws and anchors at $10-15, plus drill bits if needed at $10-20, soil at $15-30, and plants at $20-60. Total material costs reach $80-180 for a modest three-tier system, with 3-5 hours of labor for measuring, cutting, mounting, and planting. Factor in potential mistakes like cutting gutters too short or drilling drainage holes in wrong locations.
Compare these DIY costs against commercial vertical garden systems. Basic fabric pocket systems sell for $25-50 requiring only soil and plants, with setup taking 15-30 minutes and zero tools. Mid-range commercial systems including self-watering planters or modular systems cost $80-200, offering polished appearances and often better materials than DIY projects. High-end living wall systems with integrated irrigation range from $300-1000+ but include features very difficult to replicate in DIY projects.
Consider hidden costs often forgotten in DIY calculations. Tools you must purchase get used once then sit in closets—that $30 staple gun serves one purpose if you never use it again. Mistakes waste materials—cutting boards wrong, drilling incorrectly, choosing materials that deteriorate rapidly. Transportation costs for heavy materials like soil bags, lumber, or gutters add up through multiple store trips. Time spent researching, planning, shopping, and building instead of earning income or enjoying leisure has economic value even if not tracked monetarily.
Evaluate your skill level honestly as it dramatically impacts both cost and time. Experienced DIYers work efficiently with proper tools and fewer mistakes, potentially saving significant money through DIY approaches. Beginners face steep learning curves, work slowly, make costly mistakes, and might create systems that fail or function poorly, effectively wasting all invested time and money. Someone who has never used power tools or built anything might spend 8 hours and significant frustration building a gutter system an experienced person completes in 2 hours.
Account for opportunity costs of time investment. If building a DIY pallet garden takes 6 hours from research through completion, that time has value. If your time is worth $20/hour through either employment or personal valuation, those 6 hours represent $120 in opportunity cost. Adding this to $100 in materials means your “free pallet garden” actually costs $220 in real terms. A comparable commercial system for $150 saves you both money and time while likely offering better design and durability.
Consider longevity and quality differences. Well-built DIY systems using quality materials can outlast cheap commercial products while providing satisfaction of personal creation. However, poorly executed DIY projects fail within one season, wasting all investment, while quality commercial systems last for years despite higher initial cost. Cheap DIY materials like thin plastic bottles or untreated wood deteriorate quickly, requiring reconstruction next season.
Factor in enjoyment and learning value that don’t appear in pure cost calculations. Many people genuinely enjoy DIY projects, finding creative satisfaction worth far more than money saved. Learning new skills provides value beyond single garden projects—those skills apply to future projects, creating compounding value. Building vertical gardens with children or friends creates memories and bonding experiences that commercial purchases cannot replicate.
Alternatively, some people find DIY projects frustrating rather than enjoyable. Forcing yourself through projects you hate wastes time and energy that could have gone toward actually gardening and enjoying plants rather than struggling with construction.
Make strategic choices based on specific projects. Buy commercial for complex systems requiring specialized materials or skills you lack, for systems where quality matters significantly like irrigation components, for first projects when you’re testing whether vertical gardening suits you before investing heavily, or when time limitations make DIY impractical despite theoretical cost savings.
Choose DIY for simple projects matching your skill level like hanging fabric pockets or arranging commercial pots on purchased stands, when you already own necessary tools minimizing additional investment, when you’re genuinely excited about the building process itself, or when truly budget-constrained and willing to invest time for savings.
The most cost-effective approach often combines both strategies—purchasing well-designed commercial containers, pots, or components while DIYing the structural elements like mounting boards, hanging systems, or stands that require fewer specialized skills. This hybrid approach leverages commercial quality where it matters while saving money on elements you can competently build.
Ultimately, the “best value” calculation depends entirely on your individual circumstances, skills, available time, and what you value beyond simple dollar costs. Neither approach universally provides better value—the answer lies in honest self-assessment of your specific situation and priorities.
My vertical garden succeeded this year, but how do I manage soil replacement or refreshing without completely dismantling everything I built, and how often does soil in vertical systems actually need replacing?
This important maintenance question addresses long-term vertical garden management as container soil deteriorates faster than ground soil through nutrient depletion, structural breakdown, salt accumulation, and potential disease or pest buildup. Understanding soil management practices extends system life and maintains plant health without requiring complete annual reconstruction.
Understand how container soil degrades over time through several processes. Nutrient depletion occurs as plants absorb elements for growth while frequent watering leaches mobile nutrients from limited soil volumes. Organic matter decomposition causes soil that initially felt light and fluffy to become dense and compacted over months as composted materials break down further. Salt accumulation from fertilizers and water minerals builds to toxic levels in containers without the dilution that occurs in ground beds. Soil structure collapse creates poor drainage and reduced air spaces around roots as lightweight components like peat or coir compress. Disease and pest pressure increases when the same soil supports plants year after year without the natural pest control and soil renewal that occurs in ground gardens.
Determine replacement timing based on plant type and soil condition rather than rigid schedules. Annual vegetables and flowers benefit from complete soil replacement each growing season since intensive growing depletes soil rapidly. Perennial herbs or ornamentals tolerate the same soil for 2-3 years with proper top-dressing and fertilization. Soil showing obvious problems requires immediate replacement regardless of timing—signs include water that runs straight through without absorbing, soil that smells sour or rotten, white crusty salt deposits on container rims or soil surface, compacted soil that feels hard and drains poorly, or plants performing progressively worse each year despite adequate care.
Refresh soil without complete removal through several strategies that extend soil life and reduce labor while improving growing conditions. Top-dressing removes 2-3 inches of old soil from container tops and replaces it with fresh potting mix mixed with compost. This introduces new nutrients and organic matter where roots grow most actively while leaving root balls undisturbed. Perform this annually in spring before new growth begins.
Mix time-release fertilizers or slow-release organic amendments into top 2-3 inches of soil without removing any, replenishing nutrients for the coming season. Products like Osmocote or organic alternatives provide steady nutrition for 3-6 months. Flush containers monthly during the growing season by watering heavily until significant water flows from drainage holes, carrying away accumulated salts. This simple practice prevents salt buildup that would otherwise necessitate complete soil replacement.
Add compost or worm castings as 1-inch top layers, allowing nutrients to filter down through existing soil with each watering while improving soil structure as organic matter integrates. This works particularly well for perennial plantings. Incorporate beneficial microbes through compost tea drenches or commercial mycorrhizal products that improve nutrient availability and disease resistance without physical soil removal.
Manage complete replacement efficiently by planning strategic timing during early spring before planting or after fall harvests when plants finish. Most vertical garden systems empty more easily when not actively growing. Work systematically section by section rather than attempting complete system renovation simultaneously. In large pallet gardens, empty and refill two or three pockets weekly over several weeks rather than facing the overwhelming task of complete replacement in one day.
Reuse old potting soil rather than discarding it as complete waste. Spread used soil in ground-level garden beds where volume dilution reduces salt concentration concerns and nutrients remaining benefit in-ground plants. Compost old soil mixed with kitchen scraps, yard waste, and browns, allowing several months of decomposition to refresh organic matter and microbial populations before reusing. Mix old soil 50/50 with fresh potting mix for less demanding plants like ornamentals that tolerate lower fertility compared to vegetables.
Avoid reusing soil from diseased plants as fungal spores and bacterial pathogens survive in soil, reinfecting new plants. Discard this soil completely rather than risking ongoing problems. Similarly discard soil that hosted severe pest infestations like root aphids or destructive nematodes.
Minimize replacement frequency through preventive practices starting from installation. Use quality potting soil initially rather than cheap mixes that degrade rapidly—the initial cost difference of $5-10 per bag saves replacement labor worth far more. Include time-release fertilizers at planting reducing the fertilization frequency that contributes to salt buildup. Practice crop rotation in vertical gardens just as in traditional gardens, avoiding planting the same plant families in the same pockets year after year as this builds pest and disease pressure while depleting specific nutrients.
Design systems from the beginning for easy maintenance access. Build pallet gardens allowing removal of fabric backing for complete soil replacement when eventually necessary rather than permanent installation making this impossible. Use modular containers within vertical frameworks allowing you to remove, empty, and refill individual containers rather than working with integrated pockets. Create trellis-based systems using standard pots easily removed for soil changes rather than permanently attached planters.
Keep maintenance records noting when you refreshed or replaced soil in different sections of your vertical garden. Simple notes prevent confusion about which areas received attention recently versus those needing work soon. Track plant performance changes over years to identify when soil degradation affects results despite your fertilization efforts, indicating replacement time has arrived.
Remember that soil management represents ongoing maintenance rather than one-time setup tasks. Building this reality into your vertical gardening expectations and systems design prevents surprise at the work required while keeping your vertical gardens productive and beautiful for many seasons of growing.


